What you’ll do
- Generate a certificate in Core8 and complete the NetSuite OAuth setup.
- Connect NetSuite to Core8 using the required IDs.
- Configure mappings and verify imported data.
Access
- Only managers can manage integrations.
- Open Settings → Integrations (URL:
/{orgId}/integrations). - Some integrations may be disabled in your organization. If the NetSuite tile is disabled, contact Core8 support.
What you’ll need
From NetSuite (admin access):- Account ID (from Company Information)
- Client ID (from an Integration record using client credentials / M2M)
- Certificate ID (from an OAuth 2.0 Client Credentials mapping)
- A NetSuite certificate generated/downloaded from the NetSuite integration Connection tab
Step-by-step: Connect NetSuite
1) Enable required NetSuite features
In NetSuite:Setup → Company → Enable Features
- REST Web Services
- OAuth 2.0
- SuiteAnalytics Workbook (required for SuiteQL-backed reads)
2) Copy your NetSuite Account ID
In NetSuite:Setup → Company → Company Information
Copy the Account ID (examples: 1234567, 1234567_SB2).
3) Create an integration record (Client ID)
In NetSuite:Setup → Integration → Manage Integrations → New
- Create an integration that supports OAuth 2.0 client credentials (M2M).
- Save and copy the Client ID.
4) Generate the certificate in Core8
In Core8:- Open Settings → Integrations.
- Click the NetSuite tile.
- In the Connection tab (
/{orgId}/integrations/netsuite?view=connection), click Generate Certificate. - A
.pemfile downloads — you’ll upload this to NetSuite.
Core8 displays the certificate expiry in the UI. If it’s expiring soon, use Renew Certificate and update the NetSuite mapping.
5) Create the OAuth 2.0 Client Credentials mapping in NetSuite (Certificate ID)
In NetSuite:Setup → Integration → OAuth 2.0 Client Credentials (M2M) Setup
- Click New.
- Select:
- User: your integration user
- Role: your integration role
- Application: the integration record you created
- Certificate: upload the
.pemfile from Core8
- Click Save.
- Copy the Certificate ID shown after saving.
6) Enter IDs in Core8 and connect
Back in Core8 (NetSuite integration → Connection):- Enter:
- NetSuite Account ID
- NetSuite Client ID
- NetSuite Certificate ID
- Click Connect.
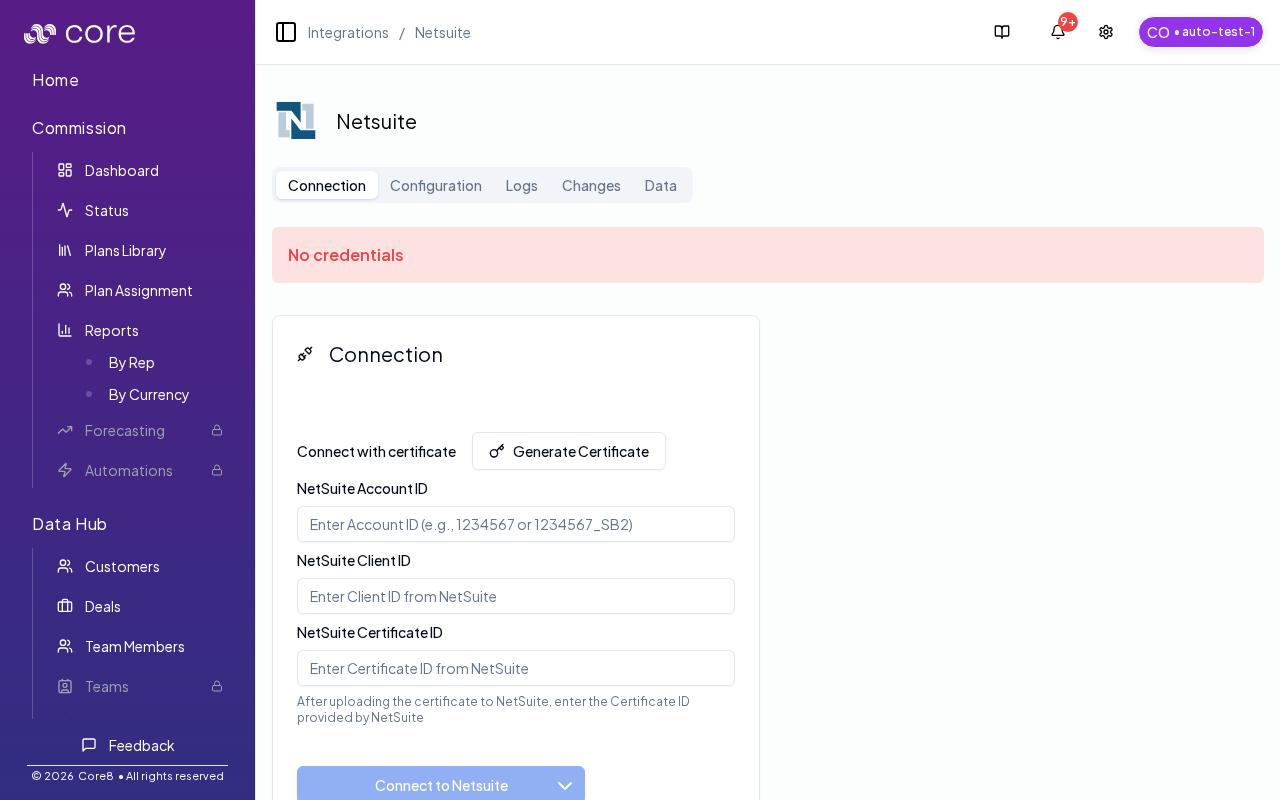
If you haven’t connected NetSuite yet, the connection page may show a “No credentials” banner until you enter the Account/Client/Certificate IDs.
Configure in Core8 (recommended)
After connecting, open the Configuration tab (/{orgId}/integrations/netsuite?view=config) to configure:
- Field mappings (for example Customer Number)
- Enum mappings (for example currency, payment terms, invoice status, deal stage)
- Per-object sync modes (read-only vs bidirectional where supported)
Verify and troubleshoot in Core8
Use the NetSuite integration tabs:- Logs (
?view=logs) for integration issues/logs. - Changes (
?view=changes) to review what changed during sync. - Data (
?view=data) to inspect synced objects.
Troubleshooting (common cases)
- Invalid grant / invalid certificate: confirm the
.pemyou generated in Core8 is the one uploaded in NetSuite’s OAuth 2.0 mapping, and that you copied the correct Certificate ID. - Wrong Account ID: confirm the exact Account ID string from NetSuite Company Information (sandbox IDs often include suffixes).
- 401/403 unauthorized: confirm the integration user + role in NetSuite can access the objects you expect Core8 to read/sync.